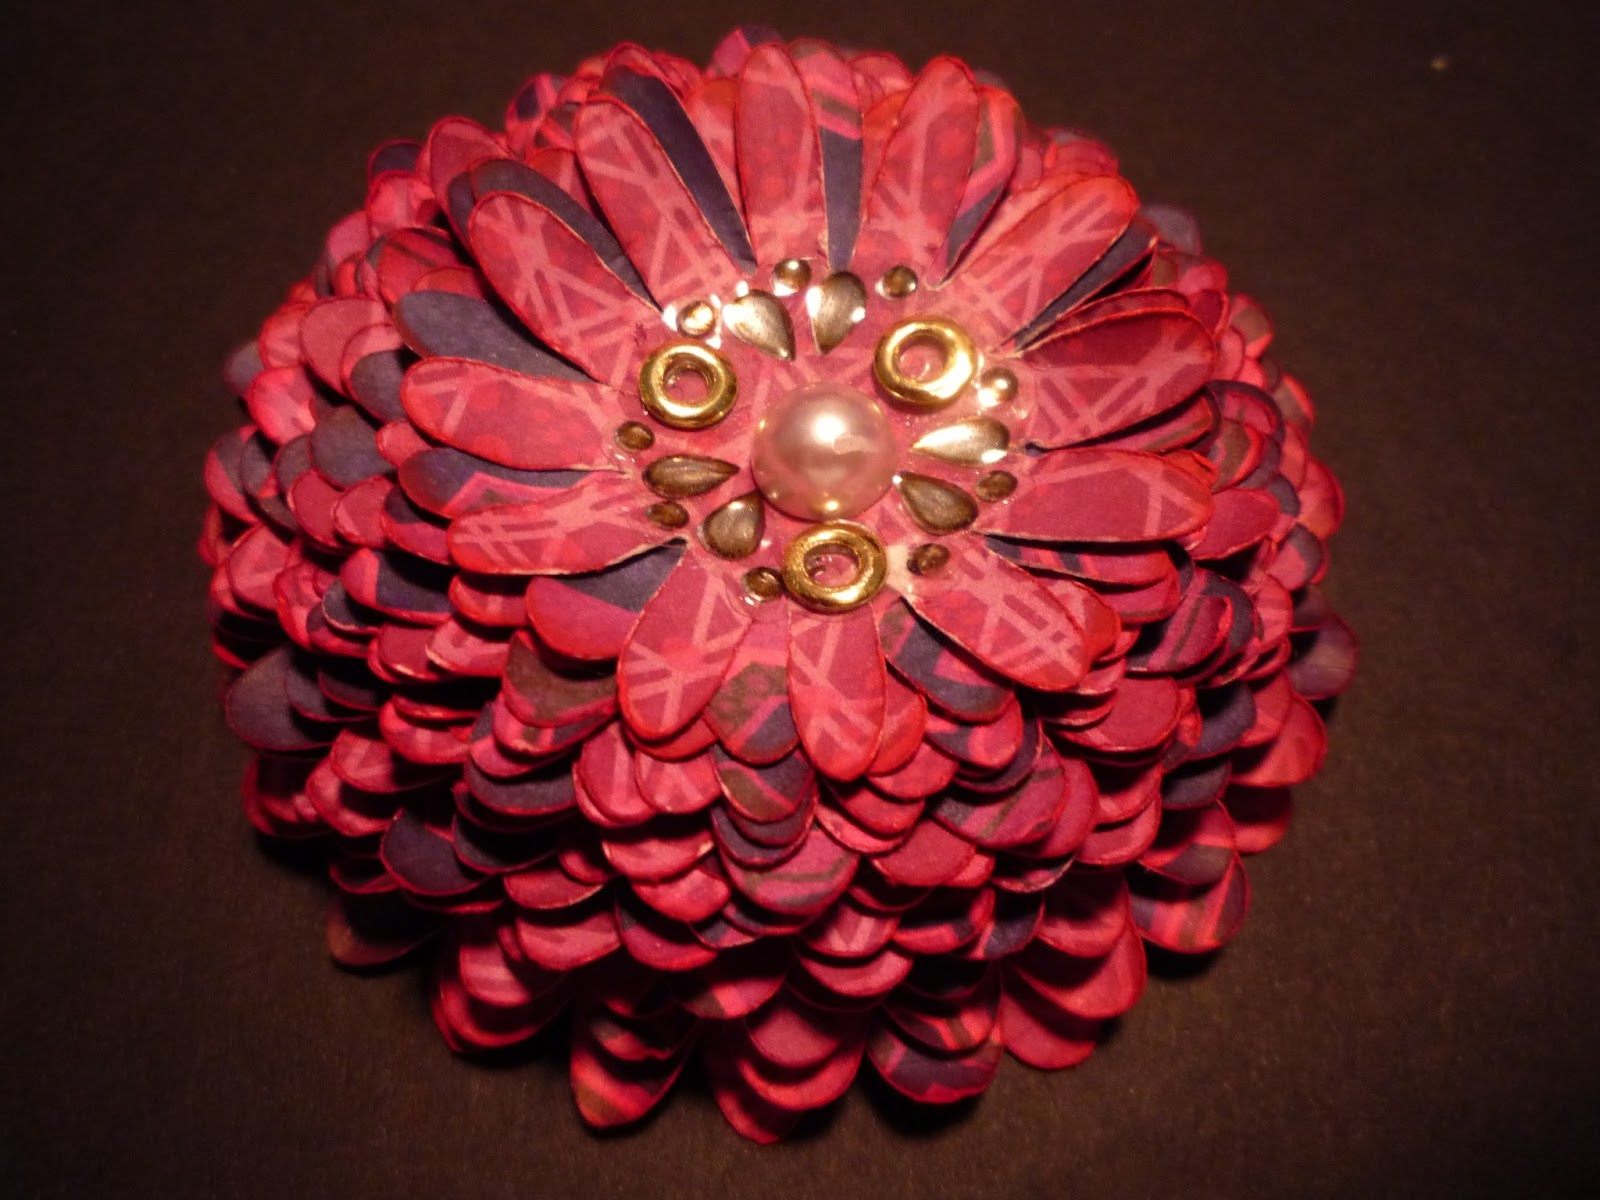
This flower has so many possibilities and can be changed to make it fuller or thinner, or smaller or bigger, change the number of petals or whatever your imagination can come up with. Here is a pic of the finished flower:

As this is my first Tutorial, please bear with me if it is horrible.
Step One:
Cut out your flowers. Here you can see I have cut out 10 petal flowers starting at 3". Each set of 3 flowers is 0.125" smaller than the previous set of 3. The smallest set is 2".
Step 2:
Ink the edges of the flowers on both sides
Step 3:
Curl petals around something round (I guess that was obvious huh?). I use the end of a paint brush. Once the petals are curled, you will see, in the picture above, that there are some white edges showing. I went back and inked the showing edges.
Step 4:
Off set petals and adhere together. I use hot glue because I am too impatient to wait for regular glue to dry. I suppose you could use glue dots or quick drying glue, but I haven't tried them. My hot glue gun and I go way back! You could probably even use dimensionals for more height if you wanted.
Step 5:
Repeat steps 2-5 with all petals.
Step 6:
Choose a flower center and adhere it to your flower and voila, a finished flower!
I hope this makes sense. Please feel free to ask questions. I will answer as quickly as I can.
Hope you have great day and hope you have fun with this flower!
Miranda


This looks great Miranda!!
ReplyDeleteDo you use a die, or a punch to cut the flowers?
Hugs,Sandra
Hi Sandra! I guess I should have explained that a little better. I used my Cricut to cut out the flowers. The cartridge I used was the Ultimate Creative Sampler Cartridge, but you can use any flower, any size. You can also vary the degree to which you downgrade the flowers. The big flower I made for the beautiful butterfly card was made with a 4" flower and stepped down by 1/4 inch for each of the rest of the flowers and is an 8 petal flower, not 10.
DeleteThis is great, Miranda! Thanks for sharing how to do this! I'm going to be trying this very soon!
ReplyDeleteYou will have tons of fun and before you know it, you will be making all kinds different flowers.
DeleteYay! Thanks for sharing Miranda, this is soooo good! I have just been making flowers using the Cricut so will defo have to try this one next!
ReplyDeleteHugz
Laurian
Have fun with it! There are so many different variations, you will have a paper green house soon!
DeleteMiranda, You did a fantastic job with your tutorial. I understood everything. I want to help you so please do not take this wrong... Always!!! Do not take it for granted like when you said (Curl petals around something round) I would know that and I'm sure a lot of other people would but we always have to remember that their are NEW craters out there that need to be told that. Your flower turned out so beautiful and love the center. Love all the pictures also. Hope this helps in some way.
ReplyDeleteHugs, Pat
No offense taken at all. I am very open to tips, suggestions, and even constructive criticism. Every little bit of information learned helps!
DeleteGreat tutorial Miranda, I understood everything too and as a relative newbie in things like this, that's saying something. LOL.
ReplyDeletePat's right though, I wouldn't have known to curl the petal around something round so it was good that you said.
I'm glad you understood. You will be surprised at how easy this flower is. Once the petals get too small to wrap around what ever it is you have chosen, you can move to something smaller. I think the smallest thing I use is a toothpick, but that is only for very tiny things.
DeleteFlawless instructions, Miranda! I will be doing this and share with my sisters. My sis, Rhonda, love to make flowers!
ReplyDeleteHugs,
Roxann
Thanks, Roxann! You will have fun with this. I love to make my own paper flowers and this is one of my all time favorites!
DeleteGreat tutorial, Miranda. Thank you so much for sharing your talent. I don't have a Cricut, but I have some punches and dies...so I'm going to give it a go with them. I'll let you know how it turns out.
ReplyDeleteCheri, You should be able to do it with dies and punches. Your flowers may get smaller faster, but as long as you use different sizes, you should be able to make an awesome flower!
DeleteAnother great tutorial. I know you said this was your first, but I saw your tutorial on your one layer spotlight first. Great job and very good instructions to follow. That's a beautiful flower too...I love the designer paper you used.
ReplyDeleteFantastic tutorial! Love the easy directions and great photo's!
ReplyDeleteHugz, Colleen