Tuesday, April 30, 2013

Bee-Lated Birthday

Well, my sister's birthday was last week, and because I have not been feeling up to doing much, I unfortunately, was unable to attend her birthday lunch. So, I am now stuck in the belated birthday blah's. So, I decided to combine a few challenges to make her card.

Just a basic 6x6 white card stock base. All papers are from recollections. The honeycomb was cut from the Cricut Cartridge: Theresa Collins Basics. The bee is a free digital stamp from Bugaboo Stamps. I printed him out on yellow paper, colored his eyes in with white oil pencil, colored his shoes, stripe, and antennae with black sharpie. The wings and highlights on his shoes are done with Stampin' Up silver Dazzler pen. The flower stem is Certainly Celery marker from Stampin' Up and the flower is Pink Passion from Stampin' Up.
I created with flower center with a yellow flat back pearl and a strip of pink bling mesh.
Here you can see that I chose to pop the flower off the page. I am very satisfied with this card. I know my sister will love it.

Challenges this will be entered into:
1. Craftin Desert Diva's: use a pun
2. I (heart) card sketches: Challenge #16

wpid-Photo-Mar-22-2013-757-PM.jpg
Hope you like it too.

Have a great day.

Miranda

Monday, April 29, 2013

A Shabby Chic Mother's Day Card

Last week I worked on a Mother's Day card for my Mother-In-Law. Today, I finished the Mother's Day card for my Mom. Here it is:
There is a lot going on in this card, but it was actually quite easy to make. All papers are from DCWV except the butterflies and the rose. They are from recollections. The card measures 6x6. The lace is from my stash. The sentiment was printed from the computer.
This picture is showing the layers. The bottom most layer of where the flower is was cut from Best Images of 2007: Tag one. The next layer up is a square. On top of that is Shape3 from George and basic shapes. Next is a ring cut from gold paper and grunged up with white paint and black ink. Layered on top of that is a rectangle.
In the middle of the rectangle, 2 flourishes were added facing opposite of each other. They were cut from French Manor. On top of the flourishes are leaves cut from the Ultimate Creative Sampler.
The pink rose is a series of different sized 5 petal flowers from the Wedding cartridge. I lightly inked the flowers with Vintage photo to take away some of the edge of the pink paper.

The butterflies were cut from a piece of paper from recollections.

This card will be entered into 2 challenges:
1. FCCB:  paper flowers
2. The Sweetest Thing:
I absolutely love this card. I think it turned out absolutely beautiful. It was inspired by the sketch but also by a collage I saw at a craft store.

I hope you think this card is a beautiful as I do.

Have a great day!

Miranda

Happy Birthday Bear

Happy Monday! Hope you all had a great weekend. I've been very tired, so most of my crafts have been pretty simple. But, the DT at Retro Sketches posted this sketch for the challenge this week:

And the challenge at My Time to Craft is using Kraft.

Here is my rendition:
The bottom layer is actually the back side of some Kraft Christmas paper from Recollections. The bear is also made from the same Kraft paper. The polka dot paper is also from recollections. The sentiment was printed off the computer. The pink paper was scrap and the ribbon was also scrap. The bear's face was drawn on with black marker. The cream part of his face was from scrap.

Have a great day!

Miranda

Saturday, April 27, 2013

Happy Birthday Buttons

OK, last post for today, at least for now. This project will be entered into the contest at Little Scrap Pieces is buttons and bows. So, here is what I have come up with:
Just a plain white card stock base, bakers twine, miscellaneous buttons, a sentiment printed from the computer and shapes cut from Cricut Craft Room Basics . I actually really like the way it turned out.

Miranda

Just Because

This week's challenge at Flutter By Wednesday is a sketch challenge that must use a butterfly or fairy. Here is the sketch:

and here is my rendition:
The papers are from DCWV, the stamp is from Vintage Verses from Stampin' Up and is stamped in royal rose ink. The butterfly is a sticker I have had in my stash forever.

Miranda

3D Masculine Drawer

Hello again! I hope all is well with everyone! I have several things to post today and will be doing so in different posts not only to make it easier for the challenges, but also to keep myself straight.

OK, for the first post:
Challenges:
1.  Bitten by the Bug 2: Man up! Bag, Box, or Container for a Man
2. Fantabulous Cricut Challenge Blog: Make a 3D project using your Cricut.

My brain immediately went to the book stack I did earlier in the year. But how do you make a book stack manly? Well, I chose to do is as a drawer instead. I used the shirt box from Tags, Bags, Boxes and More and made a belly band to go around it. Hard to explain so, I'll show you:
 This is the top of the drawer. The papers are from a stack I have had for a while and the cover is gone, sorry. The Golf Guy is a digital stamp Free Vintage Digital Stamps and printed on paper from DCWV. The golf ball is just a circle that I ran through the embosser with the Swiss Dots embossing folder and then inked with Vintage Photo. The black strips are actually specialty paper that is supposed to look like leather. I tried to capture it on the camera, but it didn't turn out. The gold is supposed to be reminiscent of the gold  brads you see on leather furniture. It is actually from Recollections and is like bling tape or something.

This is the front of the drawer. The papers were scrap. The feet of the drawer are wooden beads I took off a necklace I found at Good Will quite some time ago. The handle is ball chain and wood beads.

Here you can see that the handle is held in place on the inside by larger wooden beads.
 

This is the drawer taken out. As you can see there are 2 compartments. I put the pencils and play8ing cards in so that you could get some perspective on size.

The is the inside of the drawer. The sides were made of wood grain scraps I found in my scrap pile. The bottom of the drawer I tried to make look like wood planks. I took some light brown paper from recollections and ran it through the embosser with a wood grain embossing folder. I then inked the raised areas with Crumb Cake ink from Stampin' Up. The edges of the "planks" were inked in Early Espresso from Stampin' Up.
 
 
Admittedly, this is not my best work, but it will be going to a good friend, who knows that I believe things are perfect because they are not perfect.
 
OK, on to the next post.
 
See you in a few minutes.
 
Miranda

Friday, April 26, 2013

Mother's Day Flowers

Hello everyone! Mother's day is coming up fast and I have started to work on my cards and gifts. Today, I finished the one the one we will send to my Mother-in -law. That is, the outside is finished. I asked my husband to choose the sentiment and he has yet to get back with me. In the end, I will probably end up choosing the sentiment, but wanted him to take some credit for the card. Anyway,  my mother-in-law loves flowers and even volunteers at a green house close to where she lives. So, I chose to make a flower card for her. Here it is:
I have seen several cards similar to this on the web, but using silk flowers and I have chosen not only to create my own paper flower but chose to ink the flower and leaf edges. The leaf is from the Ultimate Creative Sampler Cricut cartridge. I cut the big one at 6.556 x 6.931 and the smaller one at 6.556 x 6.25. I cut the stems off and adhered them together with glue stick. I then made the "stitch" lines with an olive colored sharpie. The flower is an 8 petal flower also from Ultimate Creative Sampler Cricut cartridge. I cut 4 of each starting at 4 inches for the bottom part that is curled under. Then for the upper part of the flower, the petals were curled around a paint brush handle, inked with royal rose ink from Stampin' Up. They were cut at 3 inches then decreasing at 0.25" with each set of 4 petals. The tag was cut from Cricut Basics. The sentiment is from Stampin' Up.  Oh, I forgot, the edges of the inner part of the leaf and the edge of the green part of the tag were inked with Always Artichoke ink from Stampin' Up.

I will be entering this into 3 challenges:
1. Die Cuttin' Divas challenge #112 Flowers
2. The Perfect Sentiment PSC76: Mother's Day
3. Docerela Creations challenge #136 Flowers

I hope you like it.

Have a great night!

Miranda

Thursday, April 25, 2013

Moo-chas Gracias!

Hello everyone! I trust all is well. Not feeling the greatest today, but I did go ahead and throw a quick card together while waiting for the doctor's office to call me back. This will be entered into the challenge at I (Heart) Card Sketches:
wpid-Photo-Mar-4-2013-856-PM.jpg

This is my rendition:
The card is made entirely of scraps except for the base, which is very vanilla from Stampin' Up. The sentiment was printed off the computer. The scallop was cut on the Cricut, I think from the Ultimate Creative Sampler. The cow is a digital stamp from Bugaboo Digi Stamps. It was colored with sharpies. The half circle is made from burlap strands.

I just fell in love with the cow. I think she is too cute.

Have a great day!

Miranda

Wednesday, April 24, 2013

Welcome Tag Card

Good morning all! I hope everything is going well with everyone. This will be a short post, my head is killing me. OK, this will be entered into 3 challenges:
1. Little Scrap Pieces:  Bundle of Joy (baby card, project, layout)
2. CARDZ TV: Cute as a Button (card, project, layout using buttons)
3. Catch the Bug: April Bingo Challenge (see below)
It took me a while to figure out what I wanted to do with these challenges. Here is the finished project:
This card is made entirely from scrap paper except for the card base which is a plain white card stock card I have had for a while, I think I got a whole box of them at Michael's quite some time ago. The plain beige/light brown/kraftish paper I believe if from recollections. The Blue polka dot paper is also from recollections. The buttons and bling have been in my stash for a while. I'm not sure of the manufacturer of the buttons, but I think the blue bling came from the dollar isle at Michael's. The sentiment was printed off the computer. The bear is a free digital stamp I downloaded from Bird's Cards and colored with oil pencils.
To make the "belly button" (yeah, I know, corny huh) look more like it was part of the original design, I cut along the teddy's arm so I could slide the button under it making it look like the teddy's arm is lying over the button.
This tag is actually a card. As I am unsure who will be receiving this card, I have not done anything to the inside. I like to personalize the inside, so as soon as I figure out who is getting this, I will finish the inside.

I hope you think this is as cute as I do.

Have a great day!

Miranda

Tuesday, April 23, 2013

Giggle Note Card

Hello everyone! Sorry I didn't post yesterday. I got caught up in my project and lost all track of time. It's not quite finished, but I will be entering it into 3 challenges I think. At least 2 for sure.

CASology posted a new challenge today:

 
I knew right away what I wanted to do. I have a digital stamp from I (heart) sketches of 2 giraffes laughing and is perfect for this card.


 Base cards is early espresso from Stampin' UP. The giraffe print paper is actually a desk top back ground for my computer that I printed off and cut to size. The laughing giraffes stamp is from From the Heart Digital Art Stamps and colored with oil pencils. The sentiment was printed from the computer. Below is a closer look at the stamp and sentiment.
I love the giraffes and thought they were perfect for this card.
 
Feel free to leave questions, comments, concerns.
 
Have a great evening!
 
Miranda

Monday, April 22, 2013

Star Themed Card

It's been a rough weekend. I have felt horrible and really haven't done much except for sleep. So, obviously not much in the way of crafting. But I was able to work on one project. Over at Die Cuttin' Divas, the challenge was to use a star on your project to celebrate Astronomy Day. I had a great idea in my head all week, but it just didn't seem to come to fruition until this morning. Here goes:
The card measures 6x6. The base is plain white card stock. The cow, moon, and star are made from scrap paper. The blue star paper and the cow banner paper are free digital papers I downloaded and printed from Snip, Snap, Time to Scrap. All shapes were cut on my Cricut except for the banner which was cut by hand. The moon is from Pooh and Friends, the star is from Beyond Birthdays, the cows tuft of hair, hooves and his spots are from the Ultimate Creative Sampler, and the ears are leaves from Giant Flowers. The rest of him is just a mish mash of shapes welded together to obtain the shape I had in mind. The sentiment was printed off the computer and is a quote from W. Clement Stone.
Again, the cow and star paper are digital downloads and the sentiment is printed from the computer. The stars are cut from scrap glitter paper which I believe are from DCWV glitzy glitter stack. I am unsure of what cartridges I used to cut the stars, but there are several different styles of stars.
And, I ended up with my first easel card. Hope you like it. I may be back later, depends on how I feel. Hopefully, today will be better. Please feel free to leave questions, comments, concerns, etc.

Have a great day!

Miranda


Saturday, April 20, 2013

A Note of Thanks

I'm not feeling well today, so this post will be short and sweet. This week has been very hectic with testing and doctor appointments and I am absolutely worn out.

The Challenge was a sketch from CAS(E) this Sketch:


It took me a while to figure out what I wanted to do with this one. When I did figure it out, it hit me like a ton of bricks. The black and white papers are scrap papers. The red glitter paper is from DCWV Glitzy Glimmer pack. Here you go:
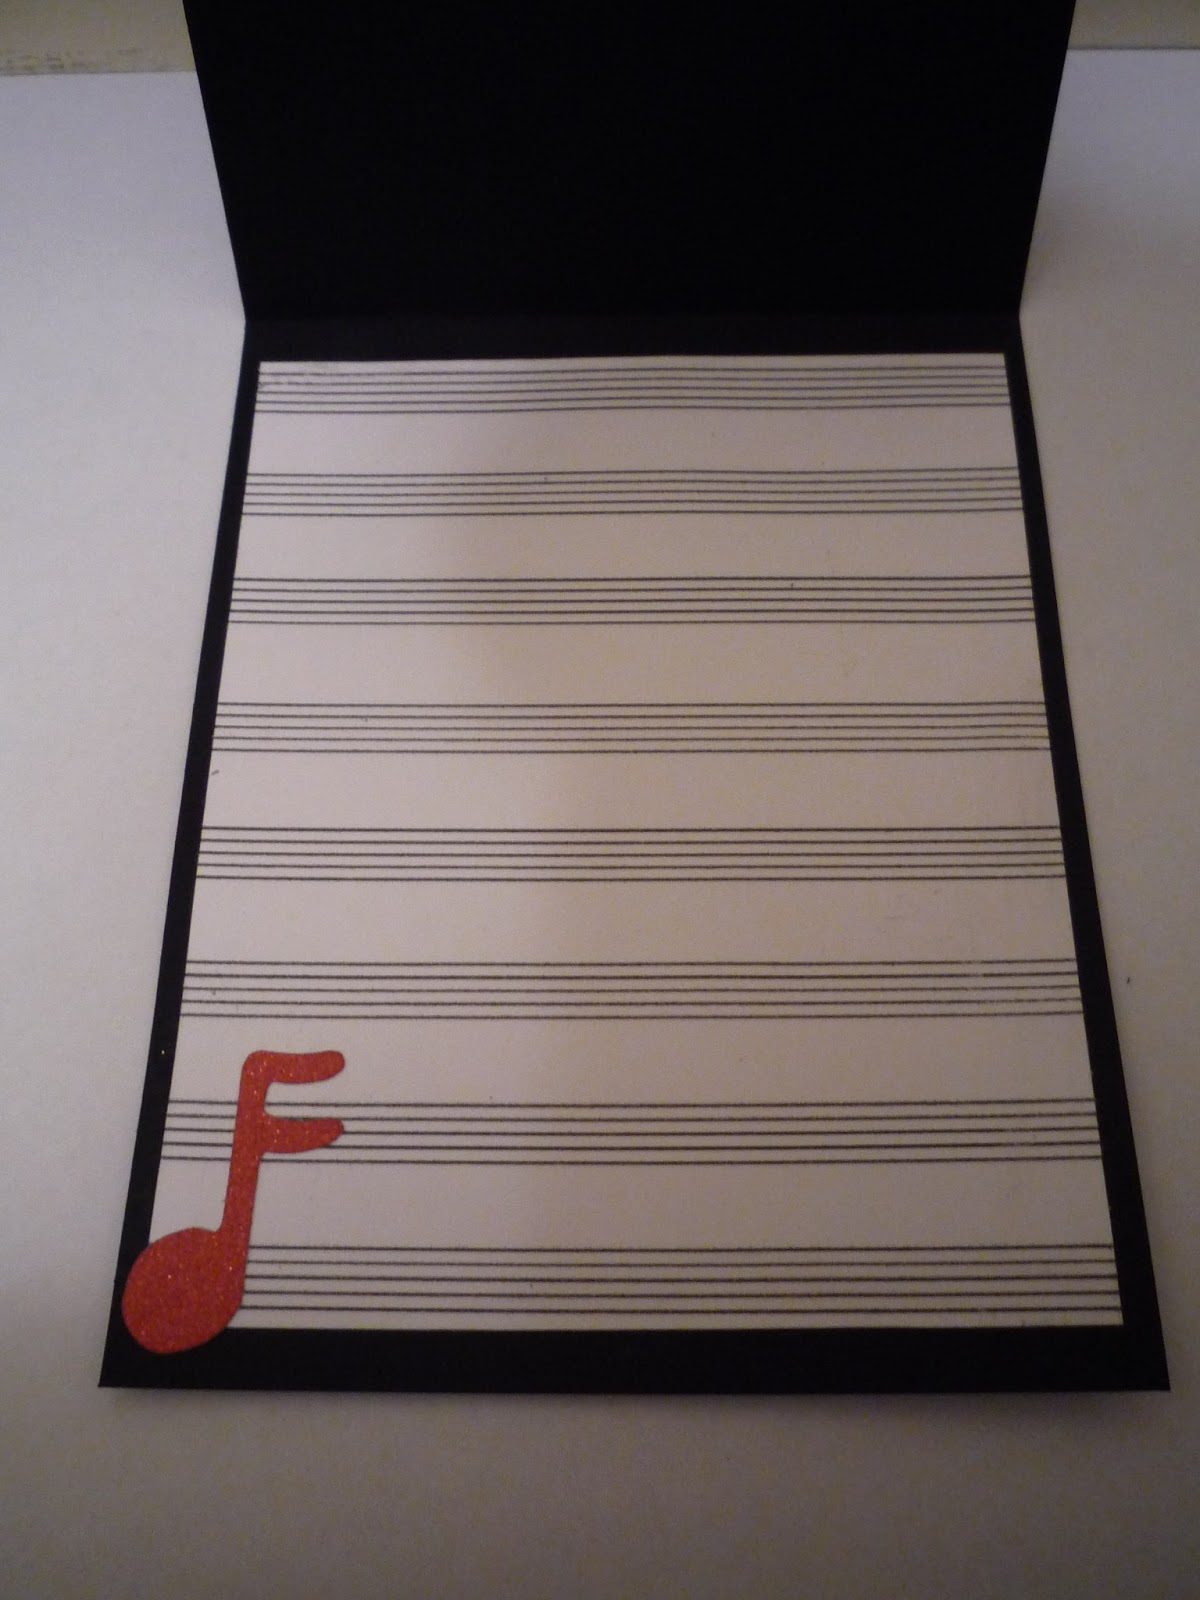
Out side of card. Music notes are cut from the Cricut cartridge 3 Birds on Parade. The sentiment is printed from the computer and the edges inked with black ink from studio g.
 

Here I tried to capture some of the glimmer from the glitter paper.
In sticking with the music theme, I thought it would be cool to use actual staff paper on the inside where a note can be written and added one more music note.

I hope you like it. Please feel free to let me know what you think.

Have a great day!

Miranda.


Wednesday, April 17, 2013

Happy Birthday Shaped Shutter Card

OK, one more card, then I have got to go to sleep. Seems like my mind is running faster than I am used to. I think it might be the cold medications. Anyway, the challenge at Paper Playtime this week is a multi-fold card. As I have little experience with multiple fold cards, I chose to stick to something simple, a tri-fold or shutter card. Well, I thought it was going to be easy. I think I made it a little harder when I decided to turn it into a shaped card. So, here it is:
 The shape was cut from the Pooh and Friends Cricut cartridge. The papers are from Colorbok.  Sentiments are printed off my computer and inked with Royal Rose ink from Stampin' Up.

I've done a couple other cards today also. Just a quick glimpse:


Have a great night everyone! I'm done for the day, I promise this time!
 
Miranda

A Sketched Note Card

I have been able to quickly make one more card today. My mom called and asked me to make a bunch of cards for her. She needs mostly birthday, sympathy, thanks, and note cards. So, She will receive the card I made earlier today, as well as this one:

The lay out is based on the sketch from Freshly Made Sketches :


I figured this would be a good note card for someone at church. Hope you like it.  I think I am finding that I like the simple, clean card. They are usually pretty quick to make, turn out pretty, and I can usually use scraps, as this one was, for everything except the card base.

Hope you all have a great night!

Miranda

With Sympathy

Today's card is very simple and easy. I have been struggling with a cold or allergies, or something and trying to do anything more complex just wasn't going to happen. Between the coughing, sniffling, sneezing, sore throat, and the shaking from the cold medication, I think I'm lucky to have gotten this much done. Anyway, I will be entering this card into 3 challenges:
1. I (heart) sketches

2. Flutter By Wednesday
      use a sentiment with butterfly or fairy
3. The Perfect Sentiment 
      color challenge: coral, aqua blue, and late

Here is my interpretation of these challenges:
OK, here's the breakdown:
"Late" card stock from Recollections.
Very Vanilla card stock from Stampin' Up
Marina Mist card stock from Stampin' Up
Coral Print Paper from DCWV A Type of Art mat stack
Sentiment printed from computer
Butterfly digital stamp from Tidbits Trinkets Images colored with oil pencils
Orange resin flat back flower
Marina Mist coordinating bias tape (not from Stampin' Up, but not sure of brand).

I think this turned out to be a beautiful sympathy card.

Before I finish this entry, I want to thank Brenda at BBTB2. I was chosen as project of the week for my April Showers entry! Very exciting!

Have a great day!

Miranda

Tuesday, April 16, 2013

Baby Umbrella

Happy Tuesday!  Hope you all had a great week end and a great Monday! Sorry, I didn't get to post yesterday. I had so much running to do, it was crazy. So, I guess I am a little behind on projects, but oh well.  I am going to enter this card into two different challenges:
1) BBTB2 (Welcome Baby)
2) FCCB (April Showers)

The umbrella shape is made from a scalloped circle cut at 10 inches, cut in half, then folded in half. The handle is the lower case letter J from elegant cakes. The purple mat piece was a circle cut at 8.5 inches and cut into quarters. The polka dot mat piece was a circle cut at 8 inches and cut into quarters. 

 The baby was cut from Everyday Paper dolls. I accented the "shadow" areas with a Stampin' Up Certainly Celery marker. For the "trap door" button, I used a small coordinating rhinestone.  The face if a Peachy Keen stamp from the Wide Eyed Kids collection. I doodled on the curl and the flower is from Recollections. The word "baby" came from die cuts from the paper pack I was using popped up on foam mounting tape. I used a stack from Colorbok called Sweet Floral.
The sentiment was printed off the computer and adhered to the inside.

Now, I know that usually baby girl cards are usually pink. Well, I don't do pink. So, I usually substitute what should be pink with purple. So, that is why there is no pink on the card.

Hope all is well. 

Miranda

Sunday, April 14, 2013

CAS(E) this sketch: Grow

My husband fell asleep watching the Masters and off to the craft room I went. I really didn't even know what I wanted to do. I sat down with the CAS(E) this sketch challenge in my head
 and just stared at a blank card for what seemed like forever. I finally decided I wanted to do lacing and that's all I knew. So, after a while, I ended up with this:
I wanted it to appear that the flower was growing off the page, but didn't want the flower to actually go off the page, so I only made half a flower.

The paper flower was cut from the ultimate creative Cricut cartridge and is from 2 different colors of scrap blue paper. The center is a flat back resin flower.
I guess you could call this the stem. The bottom most green paper was a scrap and I think was from a DCWV line, though I'm not sure which one. The next paper later is just a scrap piece of green that I punched holes in to make a lacing guide. The lacing is seam binding that I cut in half. The color is very close to certainly celery from Stampin' Up, but I don't think it's actually a Stampin' UP product. The small flower buttons are from Stampin' Up. I printed the work grow off the computer then cut it out in a leaf shape, inked the edges with a darker green and drew the veins on with Certainly Celery marker from Stampin' Up.

Hope everyone has a great rest of the day!

Miranda