Saturday, August 31, 2013

OutLawz: Anyting Goes: 3D Hot Air Balloon

This weeks challenge at The Outlawz Challenge blog is "Anything Goes." Last week I started on a 3D project for the Up UP and Away challenge, but ran out of time to complete it, so, I have decided to use it as my DT entry this week. I will show you a couple pictures then give you further details.


Ok, to start with, this project was inspired by MsLiberty25 on You Tube. I used her tutorial (here). I only used the tutorial for the actual balloon part of the project. I balloon part was cut from the Cricut Alphabet cartridge. It is the shadow of the lightbulb. I cut the "screw" part off.

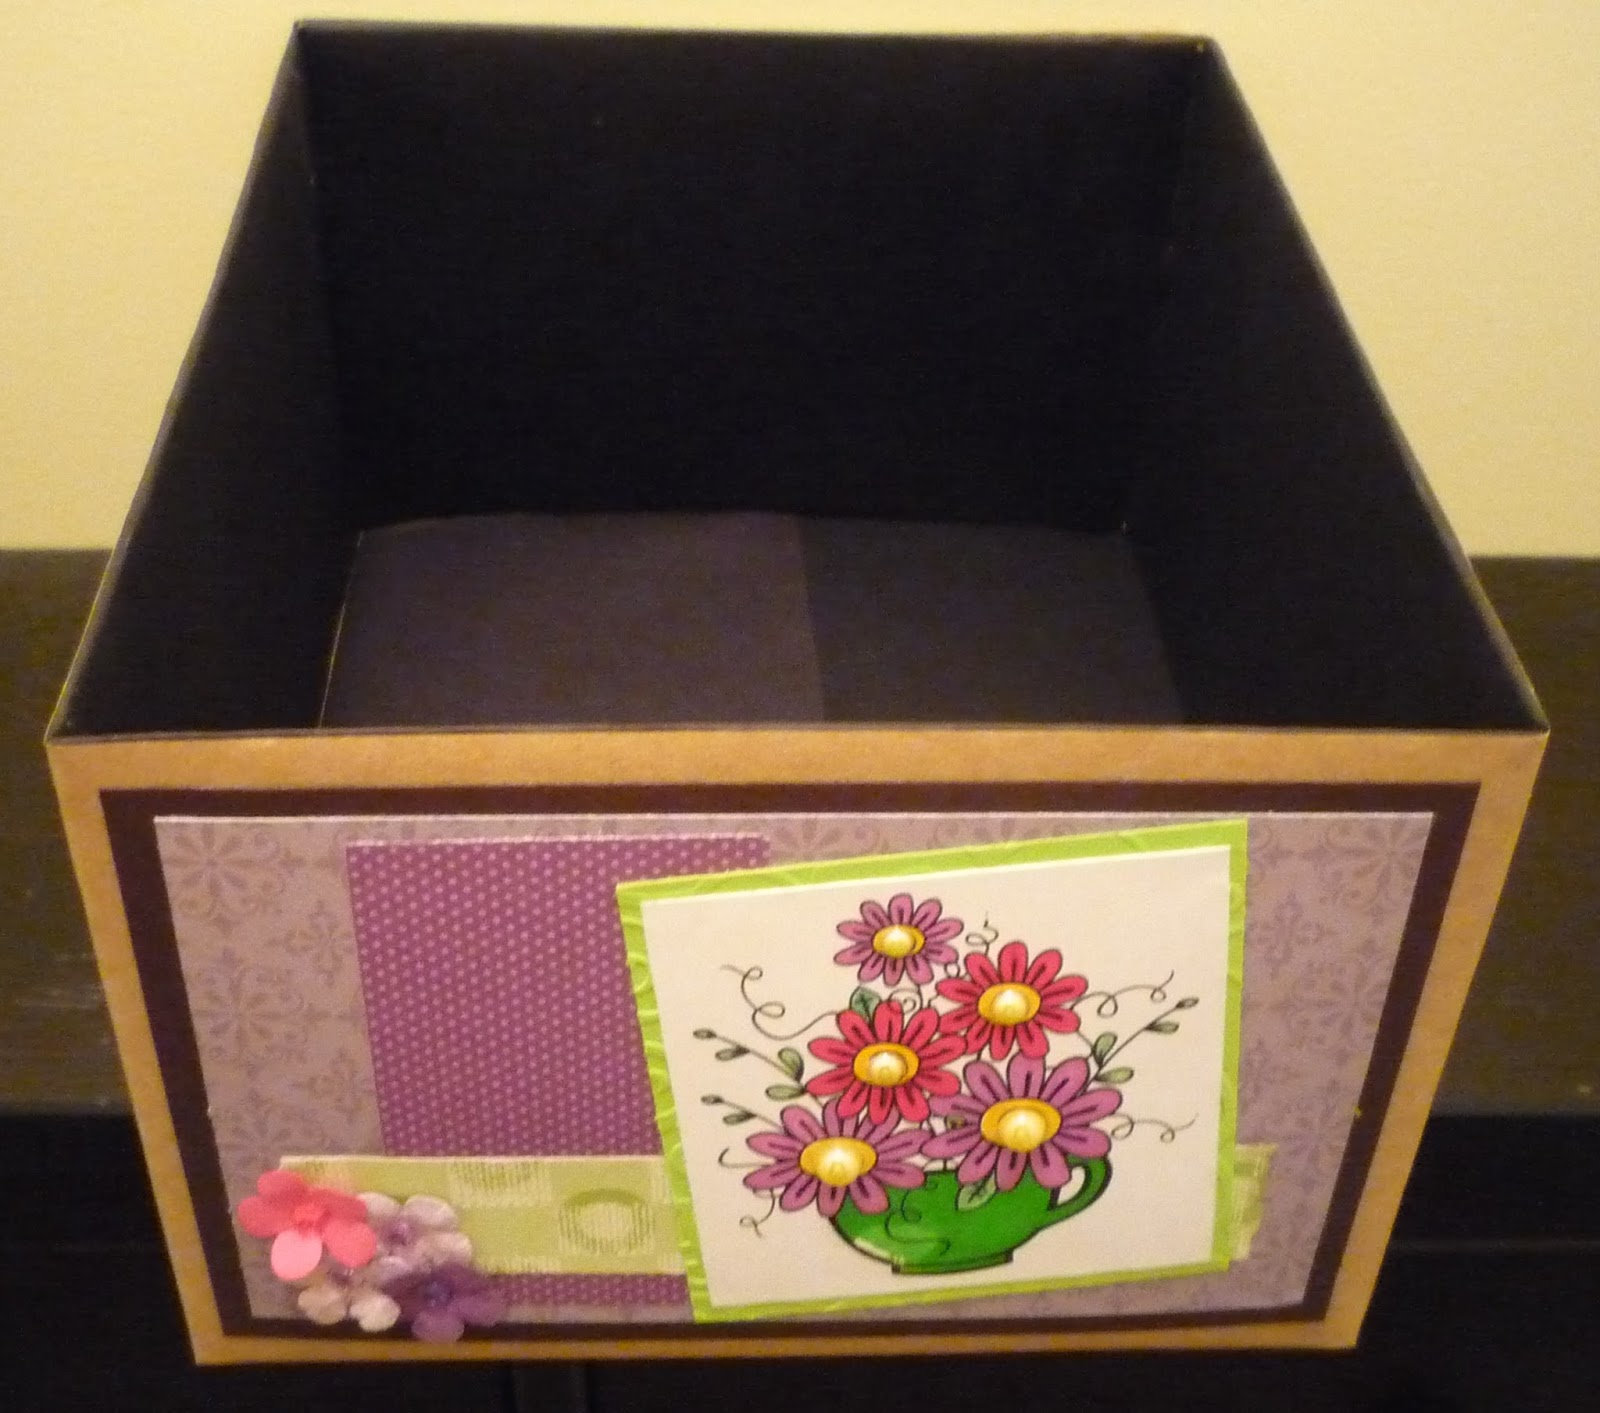
The basket is a plain open box that I used fabric tape to decorate. The "ropes" used to connect the basket and the balloon are actually coffee stirrer straws, wrapped in pink card stock, then adhered to the corners of the basket and to the balloon. The box was cut using the Cricut Cartridge Bags, Tags, Boxes and More.

The round ring that goes around the circumference of the balloon is thick floral wire wrapped in fabric tape. I hot glued the ring in place. I then added tear drop pearls to the ring, then added small flowers. I also wrapped bakers twine to form swags. The swags by themselves were to light to dangle, so I added the beads to add some weight so they would drop.

The flower on top of the balloon is handmade. I used a 6 petal flower to make the rose. I added 3 leaves and some vines for extra flair.  The leaves were cut from the giant flowers cartridge and the vines were cut from the Ultimate Creative Series Cartridge.

I do not remember the name of the paper collection I used. I got the paper quite a while ago and the cover has come off. I remember not really liking it when I got it and wasn't really sure what I would do with it, but I think it was perfect for this application. I am very interested to know what you think.

Challenges:
Exploring Cricut: Use at least 2 Cricut Cuts
Die Cuttin' Divas: Just Because
Created with Love: Anything Goes
Through the Craft Room Door: Anything Goes
Delightful Challenges: Make the Cut
Little Scrap Pieces: Anything Goes
Paper Play Time: Use Pearls


Have a great holiday weekend and stay safe. Please be careful and if you plan on drinking, please give up your keys. (Ok, I'll get down from the soap box).

Miranda

Tuesday, August 27, 2013

Vintage Train

I'm having a horrible morning. I woke up very early and I guess my gall bladder is acting up because I am quite nauseated and nothing I have taken is helping. I have a horrible headache and all I want to do is go back to sleep. But, I know from experience that if I go back to bed now, I am asking for trouble. So, to try to take my mind off everything, I headed to the craft room.

I Heart Sketches put up a new sketch yesterday.
Card Sketch Pattern

And, call me crazy, but my mind instantly said "Masculine." I'm not quite sure why considering hearts are usually a girl thing. But the more my mind worked the more of a plan I came up with. So, I put that plan to paper this morning:
This is what I did.

Card Size: 4.5" x 5"

First Brown Layer: Early Espresso from Stampin Up cut at 4.75" x 5.25".

Next Layer: Generic cream card stock that measures 9.5" x 5". I then folded it in half length wise and cut 1" from the bottom of the side I chose to be the front of the card. Distressed with Vintage Photo distress ink.

Train Tracks: Free clip art. Honestly I'm not sure where I got them. I Googled Train Tracks Digital Stamps and picked just a plain set of tracks. Before printing them out, I went over the cream paper with a very dry sponge containing Vintage Photo Distress Ink. The tracks measure 1" x 5" and 0.5" x 5".

Circles: They measure 3.75", 3.5", 3.25".

The image: Vintage train image is from Free Vintage Digital Stamps.com. I printed it out on some vintage "book" paper from the DCWV Art Type stack. I distressed the edges of the train circle with Vintage Photo.

I adhered all 3 circles together then adhered the whole thing to the card so that the bottom of the circle lines up with the bottom of the brown base layer.

The "steam clouds" were cut from the Cricut and inked with a dark grey sharpie.

I really like the way this turned out and have a couple of guys in mind that would really love it.

I hope you like it too.

Miranda

Monday, August 26, 2013

Oo, Oo! Pick me! Pick me!

Ok, the title is a bit dramatic, but I can get that way sometime. So, you ask, why did you name the post that? It's because Delightful Inspirations (from the heart) is having a design team call. Usually, I don't participate in design team calls, but I love the images of Faith Skrdla and they also have fabulous weekly sketch challenges.  So, I whipped up something.

This is a recessed window card. It measures 5" x 6". The recessed window measures 4" x 4". If you have not made a recessed card and are interested in a tutorial, you can find all kinds of good ones on you tube. The brown cardstock is Early Espresso from Stampin Up. The image is from From the Heart Stamps and is called Spring fence. I used a combination of Sharpie markers and Stampin' Up markers to color the image. I had a hard time with the grass as you can see. No matter what I did to it, it kept coming out all streaky. So, I have up on it for fear of making it even worse. The sentiment is also a From the Heart digital stamp and is printed on scrap cream cardstock. The leaves were cut from the Cricut and I drew in some veins. The metal butterfly is from Maya Roads and the rhinestone is from Michaels.

Hope you like it.

Have a great day!

Miranda

Card Box Side 2A

AS I sat staring at what will soon become my card organization box and pondered over the next side, I realized that for me, it would be easier to split the long side into 2 5x5" sections. So, here is the first section of the second side:
The base layer is a 5" x 5" black card stock square. I then hopped on the computer and positioned the Beautiful digital stamp in the corner so that it could seen when folded back. I then cut the cardstock to measure 4.75" x 9.5". I folded it in half and then folded the corner down to reveal the stamp. I adhered the corner down with double sided tape. Next I printed out the Flower stamp (the freebie from bugaboo this week) and colored it in shades of yellow. I adhered it to the inner right hand side of the card. Then I folded the right flap over and adhered it down. I added some gold mosaic tiles  and a Martha Stewart butterfly punch. I think it turned out "beautifully."

Challenges:
Cardz TV: Color Pop
Outlawz: Sunday CAS
Bugaboo: August Color Challenge
Craftin Desert Diva: Anything Goes
Craft Your Passion: Summer Flowers

Miranda

Saturday, August 24, 2013

Jack o' Lantern Card

This was supposed to be a quick and easy card. Well, it was easy, but not so quick. Sometimes, I get all caught up in choosing the right papers and it takes me forever to decide. That was the case with this one. I ended up using digital paper from Granny Enchanted and I made the striped paper the sentiment is on. So, this is what I came up with:
Size: 4.25 x 5.5
Torn Vertical Paper Strips: digital papers from Granny Enchanted
Striped Paper: designed by me on the computer.
Sentiment: From a freebie by Far Far Hill called Vintage Halloween Décor.
Jack o' Lantern: Black circle is plain black card stock. The face was cut from the Autumn Celebrations Cricut Cartridge. The green "glow" of the jack o' lantern as well as the purple shimmer paper are scrap.

I know the colors I chose are not traditional Halloween colors. I wanted the dark burgundy to kind of represent dried pools of blood.

I think this card turned out kind of creepy, which is exactly what I was going for. What do you think?

Challenges:
I Heart Sketches: Sketch031
Addicted to CAS: Holliday
Little Scrap Pieces: Anything Card Project
Docerela Stamps: Use a Border
Through the Craft Room Door: Anything Goes
Craftin Desert Divas: Anything Goes

Up, Up and Away....The Sky's the Limit!

It's Paper A La Mode (PAM) challenge day at the Outlawz Challenge Blog. This weeks theme is Up, Up and away. The Sky's the Limit. As part of the fabulous PAM Design team, I have created 2 cards for this challenge. I had so many ideas "floating" around in my head for this challenge it was ridiculous. Anyway, this is the first card:
I started with a piece of generic white card stock measuring 4.25 x 5.5." I made the sky using a couple different sizes of scalloped ovals and sponging around them with Ballet Blue ink from Stampin Up. The landscape was created using different shades of green scrap paper. I fringed the sides of the hill and doodled some flowers and grass blades on it. The sign is cut from the Camping Cricut cartridge and the sentiment is computer generated. I covered the bottom of the sign with some grass blades cut from the Disney Pooh and Friends Cricut Cartridge. The sign looked odd just glued there. I also doodled the pine trees in the back ground. The balloon is cut from the Celebrations Cricut cartridge. I used a fiber from a piece of burlap to make it look like the balloon was tied to the pig. The pig is a digital image from Hambo stamps that I colored with oil pencils. I popped the balloon and the pic off the page with foam tape.  Cute huh?!

Ok, this next card is a total 180 from the Pic card.
I think it turned out beautifully and quite elegant. It is a sympathy card. I'm going to do the "recipe" for this one in list form. I think it will be easier for me.

Size: 5x7
Paper: Shimmer paper from DCWV and vellum from my stash
Sentiment: computer generated
Lone butterfly: 3D chipboard sticker from K and Co.
Butterfly "wreath": There are 2 layers of butterflies. The bottom layer of butterflies were cut from a scrap piece of paper that I think came from DCWV. The next layer of butterflies were cut from a piece of DP from Recollections. I glued them down so they were offset. You can't really tell from the Pic, but these butterflies are shimmery. The center rose is from my stash. The metal butterfly on the rose is from Maya Roads and I added blue rhinestones from Michaels.

Here are a couple more detailed views:


I may be back later today, I'm not sure. I have been having quite a bit a nausea lately and it appears I need to have my gall bladder out. So, it will all depend on how I feel.  Have a great day.  Until next time.....

Miranda

Friday, August 23, 2013

Card Organizer Side One

I don't know about you, but I have a plethora of cards, all of which are just kind of stuffed into a basket. There is no organization what so ever. So, I decided, it was time to get them organized. At first I thought, well, I'll just have to buy something. But, I have no money, thus I put my thinking cap on.

What I came up with is pretty simple to do, even though it not completely finished yet. I needed a box, not too big but not small either. I have a tone of bigger than needed boxes. So, I remembered where I can get free boxes.....the post office. You can pick up a standard flat rate shipping box free at your local post office. So, I went and picked up 2 medium flat rate boxes. I assembled them and cut the flaps off one end to make it an open box. before putting the box together, I took it totally a part so I could line the inside with black card stock and to make it easier to cut the flaps off one end.

Once the inside was lined and the flaps were cut off, I put the box back together with hot glue. The outside of the box was then wrapped in brown kraft paper or what some people refer to as shipping paper. Using double sided tape, I lined the straight edge of the paper up with the open end of the box and wrapped it around. I then wrapped the bottom of the box like a present.


What I have decided to do is take a sketch and decorate each side with the sketch combined with a few challenges. So, here is the first side that I have completed.

Paper: Brown Kraft, Scrap, Glimmer paper from DCWV, and Pattern paper from K&Co, plain white card stock.

Images: Tea cup flowers from Bugaboo, digital washi tape from sweetly scrapped

Flower: from my stash

Pearls: from my stash

Colored with sharpie markers.

Sketch: Freshly Made Sketches


Challenges:
My Craft Spot: 3D
Paper Play Time: Use Pearls.
Craft Your Passion: Summer Flowers

Obviously this project is not complete, but I will post each completed phase. Not only will I be decorating each side, but I will also be making organizational dividers. I hope you like it so far.

Miranda

Thursday, August 22, 2013

Let it snow!

My crafting mojo has been low this week. I have been quite ill and am going through a round of testing on my gall bladder/digestive system. But, I was able to quickly throw a card together. It is a CAS card and very simple and quick to make.

This is totally made of scrap paper. Just basic white card stock and turquoise card stock. The card base measures 5.5 x 4.25. The next layer is 5.25 x 4 and is adhered with foam tape. I ran this layers through the embosser with the Swiss Dots EF. The Snowflakes were cut from the Cricut and adhered with foam tape. The sentiment is computer generated and cut into a banner by hand. It too is adhered with foam tape.  And TaDa, you are done!

Challenges:
Perfect Sentiments: Christmas with out Red and Green
My Craft Spot: 3D

Miranda

Monday, August 19, 2013

Have a Sweet Birthday

I had time to do a quick card for the Created with Love Challenge (Something sweet). It was inspired by a card in Pinterest. I did change it up a little. I turned it into an Easel card and added some embellishments. I hope you like it.
 

This is the outside of the card. The scallop circle and the regular circle were cut from the Cricut Craft Room Basics cartridge. The regular circle was embossed with the Mary Anne embossing folder. The bakers twine is from my stash.

The sentiment is computer generated and edged in orange ink from Studio G. The presents are self adhesive embellishments from Recollections that I have had in my stash for ages.

Hope you like it.

Miranda

Saturday, August 17, 2013

Make a Wish

Ok, yesterday I promised exciting new........Well, I have been invited and have accepted a design team position for the Saturday Paper a la Mode Challenge on the Outlawz challenge site!  I am soooooo super excited! (can you tell). I am still getting to know the ropes, so hang in there with me as I'm sure it will be a bit rocky at first. But, there will be a post every Saturday!

The first challenge I am doing as DT is Birthdays. Here is my project:
Card base: Brown chevron pattern paper for DCWV Habberdash stack

Circle Layer: Cranberry paper from Stampin up. The layer is from the Designer Calendar. It is meant to be the circle version of the calendar grid. I chose to shrink it and make it card sized.

Small Rectangle layer:   Crumb Cake paper from Stampin' Up

Ribbon: from my stash. I think I bought it in a dollar bin at Michael's after Christmas this past year.

Candle: just a plain old birthday candle that you can pick up at pretty much anywhere. I get my at the dollar store.

Sentiment: freebie from Bird's Cards. The coloring was done with sharpie markers and, you really can't tell from the picture, but I put some glossy accent on the candle flame. The white highlights were done with a white gel pen.

Tip: do not use hot glue on the candle. I melted the first one in half. You might be able to do it with a low temp gun, but I don't have that option. I just ended up using Aleene's tacky glue.

I am so excited and hope you are too!

Friday, August 16, 2013

Oh, Those Summer Nights

The challenge this week @ LSP is day at the beach. I really could use one of those. But, since it is not an option at this time, I will have just day dream a little.

So, here is what I came up with:
I know, fun right?!

So, here's the scoop:
Card Base: Kraft paper from Colorbok

Scallop paper: Digital printable paper from Granny Enchanted. It's called "Fresh" and the color is peach

Inside: Plain white card stock.

Sentiment: printed on coordinating peach paper mounted on plain white card stock. Computer generated.

Photos:
1) Sunflower is cut from the cricut cartridge Ultimate Creative Series. The flower center is a button from my stash. The twine is trend twine in melon. The papers used were scrap.
2) Bathing suit: a free digital stamp that has been printed on green polka dot paper, fussy cut, and colored with green sharpie. Papersa were scrap.
3) The sun was also cut from the Ultimate Creative series Cricut cartridge and scrap paper was used.

Clothes Line: I used black cross stick floss from my stash

Clothes pin:  You can buy  mini clothes pins at Walmart for just a few bucks and you get a ton of them. I chose to add coordinating rhinestones because everything needs a little bling.

I added a little interest by scalloping the front edge of the card and by placing the sentiment in a not so traditional place.

I hope you like it.

Miranda

Exciting news.......

I have some very exciting news to share, but am going to hold back until tomorrow. I know, the suspense is killing you. But, check back tomorrow. I will be back later today to post for a challenge.

See you then,
Miranda

Thursday, August 15, 2013

Vintage Celebrate

Freshly Made Sketches put out this sketch today:

I was immediately reminded of one of what I consider an oldie but goodie.

The first few times I made this card, it was just plain old card stock and stamps. So, let me tell you a little bit about what I did this time.

The card stock colors are crumb cake, early espresso, and very vanilla. I ran the base through the embosser with the distressed lines cuttlebug embossing folder. Then I spritzed the paper with early espresso ink. I put a few drops of early espresso re-inker on my non-stick mat and added a few drops of alcohol. I dipped a paint brush into the mixture and brushed my thumb across the bristles to make a fine spray. I also let some bigger drops go randomly around the paper. The stamps are all from the Stampin' Up "Feeling Sentimental" stamp set. The celebrate sentiment was stamped on a plain piece of very vanilla cardstock and I just kind of cut it out into a random shape. I don't really like it, but it can be changed later. The inked used to stamp is early espresso.

Miranda

Sunday, August 11, 2013

You Color My World

The CAS Sunday Challenge at the Outlawz today is to use the primary colors: Red, Blue, Yellow. I saw a card on Pinterest and I have been looking for the right time to put my own spin on it.
All the papers are from the Generations Paper Pack: Primary Colors. The crayons are generic crayons, I think I got them at one of those restaurants that gives out free crayons to kids. The bakers twine is from my stash. I hot glued the crayons together, wrapped them in red, yellow, and blue tend twine, and then tied the twine into a bow. Then I glued the crayons to the card. The sentiment is from Birdies Cards.

This was fun, quick, and easy. Hope you like it.

Other Challenges:
Craftin Desert Diva's: Back to School
Craft Your Passion: Don't Get Your Twine in a Twist
Created with Love Challenges: Back to School
TTCRD: Anything Goes.
Perfect Sentiments: Favorite Technique!
          Favorite Technique: CAS, using digital stamps

Miranda

Thursday, August 8, 2013

Minion Birthday

Today is my nephew's birthday and I wanted to make his card. I wasn't sure what I wanted so I hit Pinterest looking for some inspiration. Then I remembered how we both laughed when we watched Despicable Me. So, I went in search of Minion cards. I found several but not exactly what I was looking for. So, after browsing for a little bit, my brain started coming up with all kinds of ideas. This is was I finally came up with:
The card base is just a generic plain white card stock. The striped paper is from a DSWV stack called Nana's Kids. The rest of the card was made from scrap, and the sentiment was computer generated.

I made the minion on my Cricut with a variety of basic shapes. You can get the Cricut cut file here.

I chose to cut out one piece at a time and add to the base piece, which is the body, as I went.

First I cut out the body in yellow. Then the white circle and adhered the black circle. I then added the black goggle strap and then the silver goggle and then glued the whole goggle/eye piece in place. Next I cut the overalls and adhered them in place. Next I added the pocket. The black half circle was cut out with the black eye circle. I cut the "teeth" and adhered them and trimmed them to the half circle before adhering the it to the body. The hands and feet were cut next. I went ahead and glued on the feet, but waited to glue on the hands until after I had cut out the cupcake and balloon. Once the cup cake and balloon were cut I dry placed them where I wanted them to be so I could make sure the arms would do what I wanted them to do.

I wanted it to look like the minion was having a difficult time with the cupcake. So, I mounted it so that it was coming off the page at an angle. I did this by cutting a small rectangular piece from the cardboard on the back of one of my stacks of paper and folded it in half. I adhered it to look like it was coming off the page in an angle. You can sort of see what I am talking about in these pictures:


 I popped the balloon off the page with 2 pieces of foam tape and tied bakers twine to both the balloon and the minion's free hand.

I think it's adorable. I hope you do too.

Challenges:
Outlawz: Inspired by Pinterest
My Craft Spot: Clean and Simple
Paper Play Time: Lots of yellow
Created with Love: Anything Goes
Delightful Challenges: Make it Pop

Have a great night everyone!

Miranda

Wednesday, August 7, 2013

Santa's Tree

Ok, I'm back with my second card. This card is for Lady Anne's Progressive Christmas Card Challenge. I wasn't sure what I wanted to do with this, so I turned to Pinterest and found this sketch:


Here is my interpretation

Paper: Scrap
Flowers: Recollections
Image: NanaVic

Coloring: Sharpie Markers and oil pencils
Bling: Tree: Glistening snow writer
          Santa: Studio G Glitter Glue

Hope you have a great day!

Miranda

CAS Birthday Card

I haven't felt well this week making concentrating very difficult and crafting very slow going. But I was able to eek out 2 cards. I will post them in different posts to keep me sane.

This first one is a CAS birthday card which I will enter into the Outlawz CAS Sunday Challenge: Birthday.

I really like the way this turned out.

Card base: plain white generic cardstock.
Banner: scrap paper
Sentiment: computer generated
Twine: from my stash
Roses: from my stash. I think they were from the dollar bin at Michaels.
Die cuts: Leaves cut from Ultimate Creative Series Cricut Cartridge. Each cut had 3 leaves. I cut out two and didn't like the look, so I trimmed off one of the leaves on one of the cut and places them where I thought they looked good. Before adding them to  the card I inked the center vein and edges with Always artichoke ink from Stampin' Up.

I hope you like it. I will be back soon with the post for the second card I have made. Have a great day!

Challenges:
My Craft Spot: Clean and Simple
TTCRD: Anything Goes
Perfect Sentiments: Favorite Technique (die cutting, inking)

 Miranda

Saturday, August 3, 2013

Christmas Tree with Sentiment

Ok, I totally had a late night brainstorm. The image for this card is for Lady Anne's Progressive Christmas Challenge. The stamp is by Nana Vic. The idea behind this card was to take a flat 3d image in the shape of a Christmas tree and turn it into a 3D Christmas tree on a card. So (drum roll please) the reveal: (sorry, too much DIY channel)
The papers are all scrap. The ribbon is from my stash as are the half pearls.

The image started out like this:


I sectioned out the image and cut each out in as a section of a Christmas tree and printed it out on a celery colored cardstock. Once the image had been sectioned and cut, I then trimmed the edges of the tree with decorative scissors. Then I inked the edges in Always Artichoke ink from Stampin' Up. I did the same thing with the tree trunk except using kraft paper and crumb cake ink.

The trunk was adhered directly to the paper. The base of the tree was popped up on one layer of foam tape. The next section of the tree is popped up on 2 layers of foam tape and the top section on 3 layers of foam tape.


The bow is acting as the tree topper. The half pearls are randomly places and adhered with hot glue.

I really like the way this one turned out. It was an idea I had right away when I saw the image, but was unsure how to go about getting the effect I want. I hope you like it.

This card will also be entered into:
3 Girl JAM: Kraft and Ribbon

Miranda

Friday, August 2, 2013

The Cat's Out of the Bag!

Hey everyone! I am back. I wasn't gone as long as I thought I would be, but next trip will be for about a month. So, I am making the most of my scrapping time.

As you all know, I have some health issues. I have a conditions called pseudotumor cerebri. It's a condition that presents with all the symptoms of a brain tumor without actually having one. My doctor's here at home are kind of in a bind. See, what happens is, either my body produces too much spinal fluid or it doesn't absorb it properly. This leads to a build up. Because the skull is not flexible, the pressure has not where to go except to press on my brain. I causes horrible headaches, dizziness, nausea, ringing in my ears, and a whole other slew of symptoms. My pressure is not high enough for surgical interventions and the medication I am on to help cannot be increased because of the side effects I am experiencing. So, all that is left is pain control. The doctors around here are pretty poor at controlling pain (at least so far), so I have reached out to the Cleveland Clinic and am being enrolled in a month long, very intensive chronic pain rehabilitation program.

So, I am currently waiting for the insurance to give the go ahead for the clinic.

So, until then, I will craft away. This card is definitely not my best work, but I love the image. It is the new one by From the Heart. It is for their weekly sketch and monthly challenges.
I was going for sort of a monotonish, card with a pop of color. I think I chose the wrong monotone colors though. Anyway, until next time.....

Miranda