It has been so long since I have had any extra money for crafting, I can't even remember when the last time was. Anyway, I found $20 in a pair of capris I haven't worn since last year and decided I needed to spend it on crafting stuff. And, since this is a blog about crafting on the cheap, I thought I would show you what I was able to get with my $20.
First stop was Big Lots:
As you can see, I spent a grand total of $14.93 at Big Lots. Now, I did also get a Coke that was $1.55, so I spent a total of $13.38 on craft stuff. Here is what I picked up:
The Water Color Pad has 12 sheets of paper that are 11 x 16 and was $5. The DCWV paper stack was also $5. The metal butterflies were $1.50, and the other package was a dollar. The last package is pack of "sticky Stax" Large Journaling Tags. There are a Total of 36 with 4 different styles. They kind of remind me of Post-it notes.
Next stop: Michaels. I went there specifically looking for some needed embellishments for the project I am working on for my mom for Mother's day. I spent a total of $5.60, bringing my overall total to $18.98. Here I picked up:
The most expensive item is the wood frame which was $2.49 but only $1.49 after the 40% coupon. These Items will be used on my mom's gift.
I made one more stop at Wal-Mart. I needed something for my sister to display her tag on. I ended up getting two of them, they were $0.97 each:
The total came to $2.03.
My entire shopping total came to $21.01. I went over by $1.01, But considering what I bought, I think I did pretty good. I am hoping to be back later with something, but I'm not sure. I'm pretty tired and my head is killing me.
Have a great night!
Miranda
Creative crafting by a girl with no money but plenty of imagination. Get inspired, pick up some tricks, learn something new, or just look at the pretty stuff.
Wednesday, May 1, 2013
Tuesday, April 30, 2013
Bee-Lated Birthday
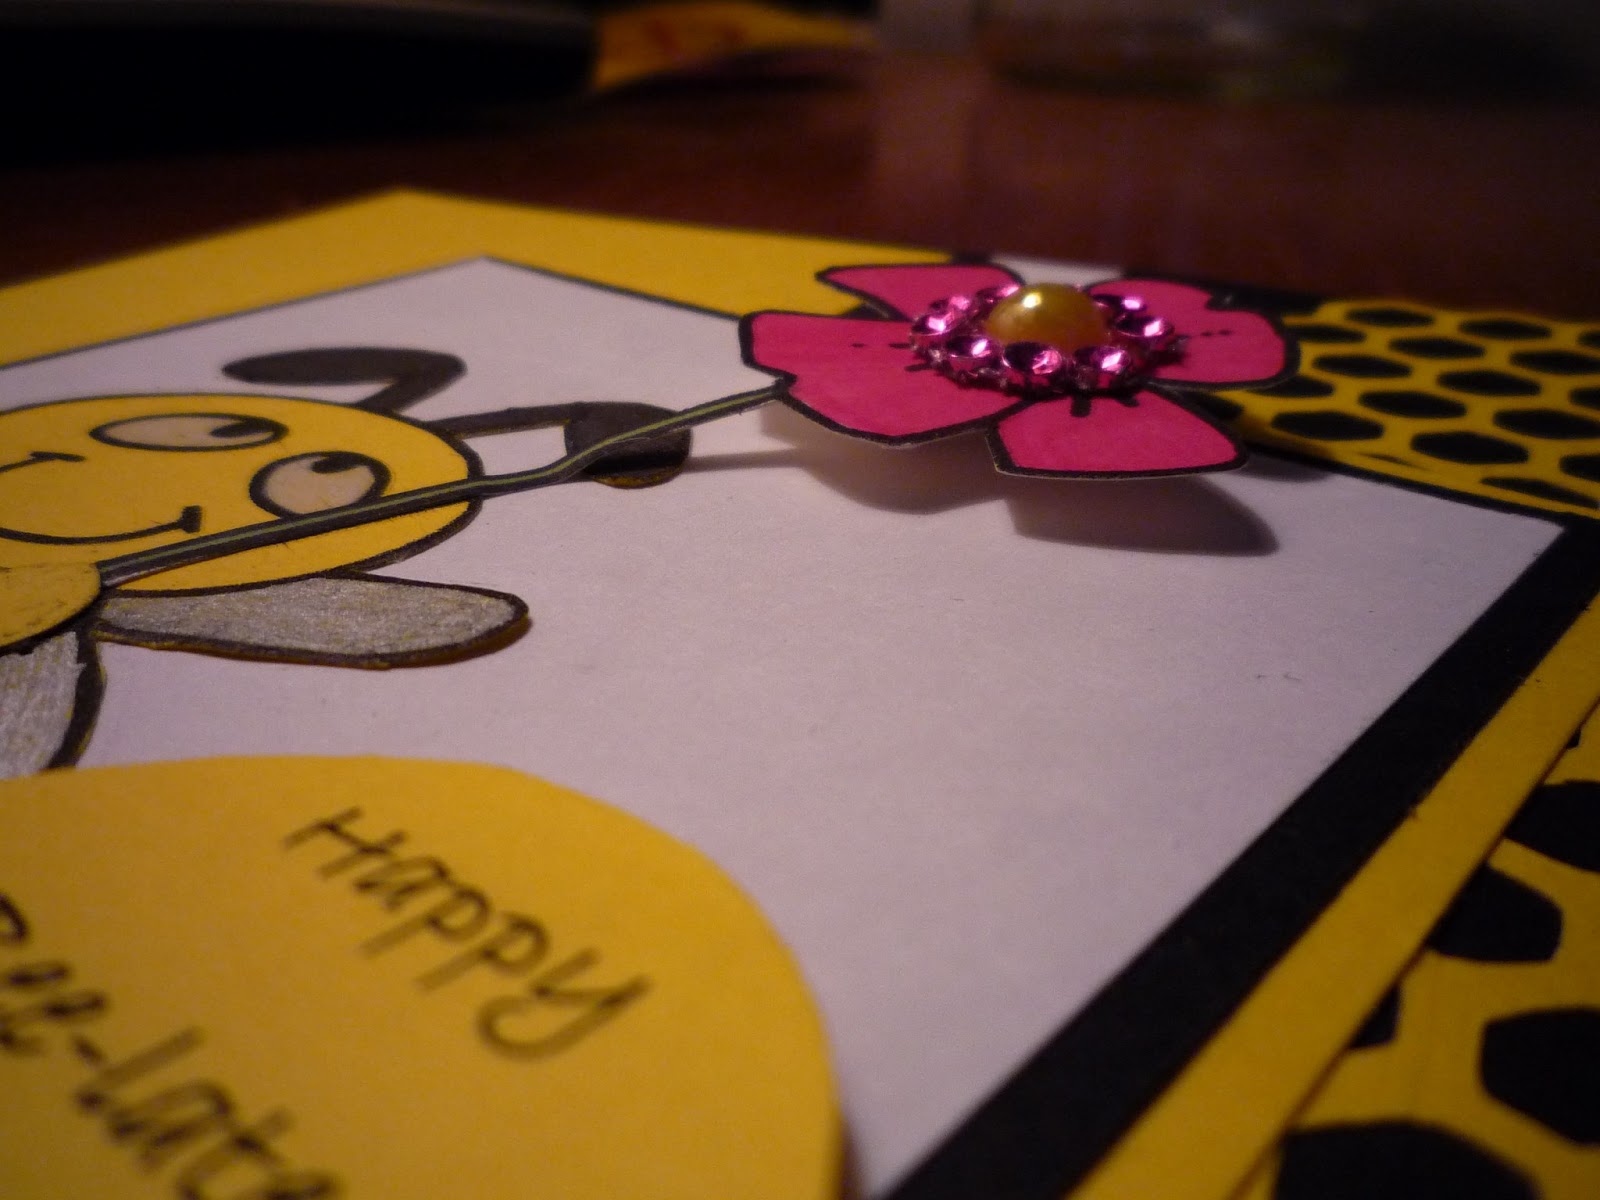
Well, my sister's birthday was last week, and because I have not been feeling up to doing much, I unfortunately, was unable to attend her birthday lunch. So, I am now stuck in the belated birthday blah's. So, I decided to combine a few challenges to make her card.
Just a basic 6x6 white card stock base. All papers are from recollections. The honeycomb was cut from the Cricut Cartridge: Theresa Collins Basics. The bee is a free digital stamp from Bugaboo Stamps. I printed him out on yellow paper, colored his eyes in with white oil pencil, colored his shoes, stripe, and antennae with black sharpie. The wings and highlights on his shoes are done with Stampin' Up silver Dazzler pen. The flower stem is Certainly Celery marker from Stampin' Up and the flower is Pink Passion from Stampin' Up.
I created with flower center with a yellow flat back pearl and a strip of pink bling mesh.
Here you can see that I chose to pop the flower off the page. I am very satisfied with this card. I know my sister will love it.
Challenges this will be entered into:
1. Craftin Desert Diva's: use a pun
2. I (heart) card sketches: Challenge #16
Hope you like it too.
Have a great day.
Miranda
Just a basic 6x6 white card stock base. All papers are from recollections. The honeycomb was cut from the Cricut Cartridge: Theresa Collins Basics. The bee is a free digital stamp from Bugaboo Stamps. I printed him out on yellow paper, colored his eyes in with white oil pencil, colored his shoes, stripe, and antennae with black sharpie. The wings and highlights on his shoes are done with Stampin' Up silver Dazzler pen. The flower stem is Certainly Celery marker from Stampin' Up and the flower is Pink Passion from Stampin' Up.
I created with flower center with a yellow flat back pearl and a strip of pink bling mesh.
Here you can see that I chose to pop the flower off the page. I am very satisfied with this card. I know my sister will love it.
Challenges this will be entered into:
1. Craftin Desert Diva's: use a pun
2. I (heart) card sketches: Challenge #16
Have a great day.
Miranda
Monday, April 29, 2013
A Shabby Chic Mother's Day Card
Last week I worked on a Mother's Day card for my Mother-In-Law. Today, I finished the Mother's Day card for my Mom. Here it is:
There is a lot going on in this card, but it was actually quite easy to make. All papers are from DCWV except the butterflies and the rose. They are from recollections. The card measures 6x6. The lace is from my stash. The sentiment was printed from the computer. This picture is showing the layers. The bottom most layer of where the flower is was cut from Best Images of 2007: Tag one. The next layer up is a square. On top of that is Shape3 from George and basic shapes. Next is a ring cut from gold paper and grunged up with white paint and black ink. Layered on top of that is a rectangle.
In the middle of the rectangle, 2 flourishes were added facing opposite of each other. They were cut from French Manor. On top of the flourishes are leaves cut from the Ultimate Creative Sampler.
The pink rose is a series of different sized 5 petal flowers from the Wedding cartridge. I lightly inked the flowers with Vintage photo to take away some of the edge of the pink paper.
The butterflies were cut from a piece of paper from recollections.
This card will be entered into 2 challenges:
1. FCCB: paper flowers
2. The Sweetest Thing:
I absolutely love this card. I think it turned out absolutely beautiful. It was inspired by the sketch but also by a collage I saw at a craft store.
I hope you think this card is a beautiful as I do.
Have a great day!
Miranda
There is a lot going on in this card, but it was actually quite easy to make. All papers are from DCWV except the butterflies and the rose. They are from recollections. The card measures 6x6. The lace is from my stash. The sentiment was printed from the computer. This picture is showing the layers. The bottom most layer of where the flower is was cut from Best Images of 2007: Tag one. The next layer up is a square. On top of that is Shape3 from George and basic shapes. Next is a ring cut from gold paper and grunged up with white paint and black ink. Layered on top of that is a rectangle.
In the middle of the rectangle, 2 flourishes were added facing opposite of each other. They were cut from French Manor. On top of the flourishes are leaves cut from the Ultimate Creative Sampler.
The pink rose is a series of different sized 5 petal flowers from the Wedding cartridge. I lightly inked the flowers with Vintage photo to take away some of the edge of the pink paper.
The butterflies were cut from a piece of paper from recollections.
This card will be entered into 2 challenges:
1. FCCB: paper flowers
2. The Sweetest Thing:
I absolutely love this card. I think it turned out absolutely beautiful. It was inspired by the sketch but also by a collage I saw at a craft store.
I hope you think this card is a beautiful as I do.
Have a great day!
Miranda
Happy Birthday Bear
Happy Monday! Hope you all had a great weekend. I've been very tired, so most of my crafts have been pretty simple. But, the DT at Retro Sketches posted this sketch for the challenge this week:

And the challenge at My Time to Craft is using Kraft.
Here is my rendition:
The bottom layer is actually the back side of some Kraft Christmas paper from Recollections. The bear is also made from the same Kraft paper. The polka dot paper is also from recollections. The sentiment was printed off the computer. The pink paper was scrap and the ribbon was also scrap. The bear's face was drawn on with black marker. The cream part of his face was from scrap.
Have a great day!
Miranda

And the challenge at My Time to Craft is using Kraft.
Here is my rendition:
The bottom layer is actually the back side of some Kraft Christmas paper from Recollections. The bear is also made from the same Kraft paper. The polka dot paper is also from recollections. The sentiment was printed off the computer. The pink paper was scrap and the ribbon was also scrap. The bear's face was drawn on with black marker. The cream part of his face was from scrap.
Have a great day!
Miranda
Saturday, April 27, 2013
Happy Birthday Buttons
OK, last post for today, at least for now. This project will be entered into the contest at Little Scrap Pieces is buttons and bows. So, here is what I have come up with:
Just a plain white card stock base, bakers twine, miscellaneous buttons, a sentiment printed from the computer and shapes cut from Cricut Craft Room Basics . I actually really like the way it turned out.
Miranda
Just a plain white card stock base, bakers twine, miscellaneous buttons, a sentiment printed from the computer and shapes cut from Cricut Craft Room Basics . I actually really like the way it turned out.
Miranda
Just Because
This week's challenge at Flutter By Wednesday is a sketch challenge that must use a butterfly or fairy. Here is the sketch:

and here is my rendition:
The papers are from DCWV, the stamp is from Vintage Verses from Stampin' Up and is stamped in royal rose ink. The butterfly is a sticker I have had in my stash forever.
Miranda

and here is my rendition:
The papers are from DCWV, the stamp is from Vintage Verses from Stampin' Up and is stamped in royal rose ink. The butterfly is a sticker I have had in my stash forever.
Miranda
3D Masculine Drawer
Hello again! I hope all is well with everyone! I have several things to post today and will be doing so in different posts not only to make it easier for the challenges, but also to keep myself straight.
OK, for the first post:
Challenges:
1. Bitten by the Bug 2: Man up! Bag, Box, or Container for a Man
2. Fantabulous Cricut Challenge Blog: Make a 3D project using your Cricut.
My brain immediately went to the book stack I did earlier in the year. But how do you make a book stack manly? Well, I chose to do is as a drawer instead. I used the shirt box from Tags, Bags, Boxes and More and made a belly band to go around it. Hard to explain so, I'll show you:
This is the top of the drawer. The papers are from a stack I have had for a while and the cover is gone, sorry. The Golf Guy is a digital stamp Free Vintage Digital Stamps and printed on paper from DCWV. The golf ball is just a circle that I ran through the embosser with the Swiss Dots embossing folder and then inked with Vintage Photo. The black strips are actually specialty paper that is supposed to look like leather. I tried to capture it on the camera, but it didn't turn out. The gold is supposed to be reminiscent of the gold brads you see on leather furniture. It is actually from Recollections and is like bling tape or something.
This is the front of the drawer. The papers were scrap. The feet of the drawer are wooden beads I took off a necklace I found at Good Will quite some time ago. The handle is ball chain and wood beads.
This is the drawer taken out. As you can see there are 2 compartments. I put the pencils and play8ing cards in so that you could get some perspective on size.
The is the inside of the drawer. The sides were made of wood grain scraps I found in my scrap pile. The bottom of the drawer I tried to make look like wood planks. I took some light brown paper from recollections and ran it through the embosser with a wood grain embossing folder. I then inked the raised areas with Crumb Cake ink from Stampin' Up. The edges of the "planks" were inked in Early Espresso from Stampin' Up.
OK, for the first post:
Challenges:
1. Bitten by the Bug 2: Man up! Bag, Box, or Container for a Man
2. Fantabulous Cricut Challenge Blog: Make a 3D project using your Cricut.
My brain immediately went to the book stack I did earlier in the year. But how do you make a book stack manly? Well, I chose to do is as a drawer instead. I used the shirt box from Tags, Bags, Boxes and More and made a belly band to go around it. Hard to explain so, I'll show you:
Admittedly, this is not my best work, but it will be going to a good friend, who knows that I believe things are perfect because they are not perfect.
OK, on to the next post.
See you in a few minutes.
Miranda
Subscribe to:
Posts (Atom)