Saturday, August 24, 2013

Up, Up and Away....The Sky's the Limit!

It's Paper A La Mode (PAM) challenge day at the Outlawz Challenge Blog. This weeks theme is Up, Up and away. The Sky's the Limit. As part of the fabulous PAM Design team, I have created 2 cards for this challenge. I had so many ideas "floating" around in my head for this challenge it was ridiculous. Anyway, this is the first card:
I started with a piece of generic white card stock measuring 4.25 x 5.5." I made the sky using a couple different sizes of scalloped ovals and sponging around them with Ballet Blue ink from Stampin Up. The landscape was created using different shades of green scrap paper. I fringed the sides of the hill and doodled some flowers and grass blades on it. The sign is cut from the Camping Cricut cartridge and the sentiment is computer generated. I covered the bottom of the sign with some grass blades cut from the Disney Pooh and Friends Cricut Cartridge. The sign looked odd just glued there. I also doodled the pine trees in the back ground. The balloon is cut from the Celebrations Cricut cartridge. I used a fiber from a piece of burlap to make it look like the balloon was tied to the pig. The pig is a digital image from Hambo stamps that I colored with oil pencils. I popped the balloon and the pic off the page with foam tape.  Cute huh?!

Ok, this next card is a total 180 from the Pic card.
I think it turned out beautifully and quite elegant. It is a sympathy card. I'm going to do the "recipe" for this one in list form. I think it will be easier for me.

Size: 5x7
Paper: Shimmer paper from DCWV and vellum from my stash
Sentiment: computer generated
Lone butterfly: 3D chipboard sticker from K and Co.
Butterfly "wreath": There are 2 layers of butterflies. The bottom layer of butterflies were cut from a scrap piece of paper that I think came from DCWV. The next layer of butterflies were cut from a piece of DP from Recollections. I glued them down so they were offset. You can't really tell from the Pic, but these butterflies are shimmery. The center rose is from my stash. The metal butterfly on the rose is from Maya Roads and I added blue rhinestones from Michaels.

Here are a couple more detailed views:


I may be back later today, I'm not sure. I have been having quite a bit a nausea lately and it appears I need to have my gall bladder out. So, it will all depend on how I feel.  Have a great day.  Until next time.....

Miranda

Friday, August 23, 2013

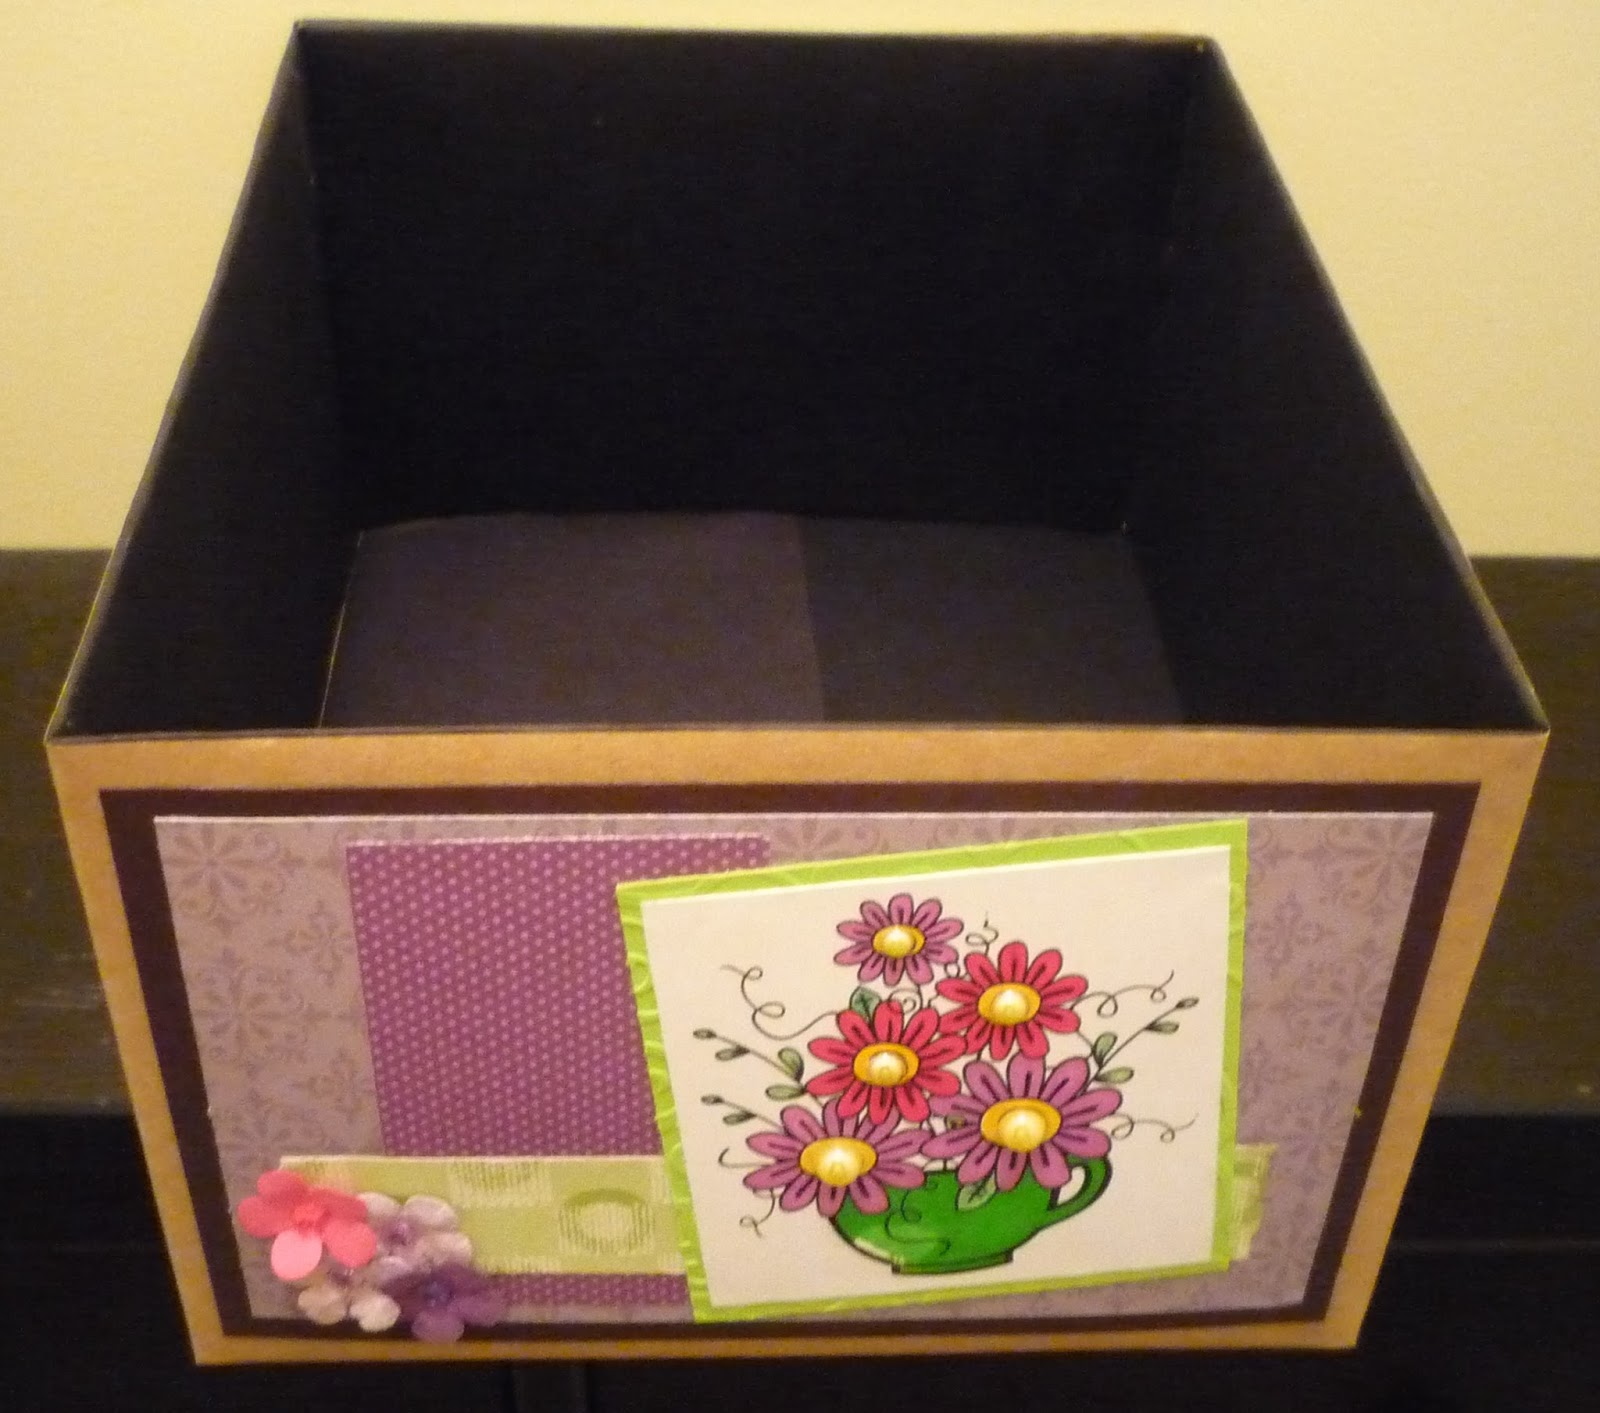
Card Organizer Side One

I don't know about you, but I have a plethora of cards, all of which are just kind of stuffed into a basket. There is no organization what so ever. So, I decided, it was time to get them organized. At first I thought, well, I'll just have to buy something. But, I have no money, thus I put my thinking cap on.

What I came up with is pretty simple to do, even though it not completely finished yet. I needed a box, not too big but not small either. I have a tone of bigger than needed boxes. So, I remembered where I can get free boxes.....the post office. You can pick up a standard flat rate shipping box free at your local post office. So, I went and picked up 2 medium flat rate boxes. I assembled them and cut the flaps off one end to make it an open box. before putting the box together, I took it totally a part so I could line the inside with black card stock and to make it easier to cut the flaps off one end.

Once the inside was lined and the flaps were cut off, I put the box back together with hot glue. The outside of the box was then wrapped in brown kraft paper or what some people refer to as shipping paper. Using double sided tape, I lined the straight edge of the paper up with the open end of the box and wrapped it around. I then wrapped the bottom of the box like a present.


What I have decided to do is take a sketch and decorate each side with the sketch combined with a few challenges. So, here is the first side that I have completed.

Paper: Brown Kraft, Scrap, Glimmer paper from DCWV, and Pattern paper from K&Co, plain white card stock.

Images: Tea cup flowers from Bugaboo, digital washi tape from sweetly scrapped

Flower: from my stash

Pearls: from my stash

Colored with sharpie markers.

Sketch: Freshly Made Sketches


Challenges:
My Craft Spot: 3D
Paper Play Time: Use Pearls.
Craft Your Passion: Summer Flowers

Obviously this project is not complete, but I will post each completed phase. Not only will I be decorating each side, but I will also be making organizational dividers. I hope you like it so far.

Miranda

Thursday, August 22, 2013

Let it snow!

My crafting mojo has been low this week. I have been quite ill and am going through a round of testing on my gall bladder/digestive system. But, I was able to quickly throw a card together. It is a CAS card and very simple and quick to make.

This is totally made of scrap paper. Just basic white card stock and turquoise card stock. The card base measures 5.5 x 4.25. The next layer is 5.25 x 4 and is adhered with foam tape. I ran this layers through the embosser with the Swiss Dots EF. The Snowflakes were cut from the Cricut and adhered with foam tape. The sentiment is computer generated and cut into a banner by hand. It too is adhered with foam tape.  And TaDa, you are done!

Challenges:
Perfect Sentiments: Christmas with out Red and Green
My Craft Spot: 3D

Miranda

Monday, August 19, 2013

Have a Sweet Birthday

I had time to do a quick card for the Created with Love Challenge (Something sweet). It was inspired by a card in Pinterest. I did change it up a little. I turned it into an Easel card and added some embellishments. I hope you like it.
 

This is the outside of the card. The scallop circle and the regular circle were cut from the Cricut Craft Room Basics cartridge. The regular circle was embossed with the Mary Anne embossing folder. The bakers twine is from my stash.

The sentiment is computer generated and edged in orange ink from Studio G. The presents are self adhesive embellishments from Recollections that I have had in my stash for ages.

Hope you like it.

Miranda

Saturday, August 17, 2013

Make a Wish

Ok, yesterday I promised exciting new........Well, I have been invited and have accepted a design team position for the Saturday Paper a la Mode Challenge on the Outlawz challenge site!  I am soooooo super excited! (can you tell). I am still getting to know the ropes, so hang in there with me as I'm sure it will be a bit rocky at first. But, there will be a post every Saturday!

The first challenge I am doing as DT is Birthdays. Here is my project:
Card base: Brown chevron pattern paper for DCWV Habberdash stack

Circle Layer: Cranberry paper from Stampin up. The layer is from the Designer Calendar. It is meant to be the circle version of the calendar grid. I chose to shrink it and make it card sized.

Small Rectangle layer:   Crumb Cake paper from Stampin' Up

Ribbon: from my stash. I think I bought it in a dollar bin at Michael's after Christmas this past year.

Candle: just a plain old birthday candle that you can pick up at pretty much anywhere. I get my at the dollar store.

Sentiment: freebie from Bird's Cards. The coloring was done with sharpie markers and, you really can't tell from the picture, but I put some glossy accent on the candle flame. The white highlights were done with a white gel pen.

Tip: do not use hot glue on the candle. I melted the first one in half. You might be able to do it with a low temp gun, but I don't have that option. I just ended up using Aleene's tacky glue.

I am so excited and hope you are too!

Friday, August 16, 2013

Oh, Those Summer Nights

The challenge this week @ LSP is day at the beach. I really could use one of those. But, since it is not an option at this time, I will have just day dream a little.

So, here is what I came up with:
I know, fun right?!

So, here's the scoop:
Card Base: Kraft paper from Colorbok

Scallop paper: Digital printable paper from Granny Enchanted. It's called "Fresh" and the color is peach

Inside: Plain white card stock.

Sentiment: printed on coordinating peach paper mounted on plain white card stock. Computer generated.

Photos:
1) Sunflower is cut from the cricut cartridge Ultimate Creative Series. The flower center is a button from my stash. The twine is trend twine in melon. The papers used were scrap.
2) Bathing suit: a free digital stamp that has been printed on green polka dot paper, fussy cut, and colored with green sharpie. Papersa were scrap.
3) The sun was also cut from the Ultimate Creative series Cricut cartridge and scrap paper was used.

Clothes Line: I used black cross stick floss from my stash

Clothes pin:  You can buy  mini clothes pins at Walmart for just a few bucks and you get a ton of them. I chose to add coordinating rhinestones because everything needs a little bling.

I added a little interest by scalloping the front edge of the card and by placing the sentiment in a not so traditional place.

I hope you like it.

Miranda

Exciting news.......

I have some very exciting news to share, but am going to hold back until tomorrow. I know, the suspense is killing you. But, check back tomorrow. I will be back later today to post for a challenge.

See you then,
Miranda